Heroic Vendor Rewards

Recently, Empire in Flames introduced a new Heroic Vendor to the game whom players can talk to in order to exchange unusual coins for rare and interesting items. In today’s Friday Feature, we take a look at a familiar face and his Heroic wares – Watto! A staple of Mos Espa, Watto can be found in his junkshop located at /way -2895 2425 on Tatooine. While his shop may not look as impressive as it did in the waning years of the Galactic Republic, the business savvy Toydarian has nevertheless maintained his eye for unique goods and is always willing to make a deal… if you have something worthwhile to trade.

Unlike other vendors, Watto isn’t after credits or junk; he will only offer his wares if you have collected strange coins during your travels. These coins are earned through the successful completion of EiF’s three instances(or Heroics), with each of these instances rewarding their own coin:

  • Plasma Mining Facility – Oily Coin
  • Sith Shrine – Dusty Coin Coin
  • Axkva Min – Hand-struck Coin

Just as the coins are unique, so are the items you can exchange them for. Watto offers skill-enhancing jewelry as well as schematics to make all new Concealable armor pieces, which can be worn underneath clothing while still providing full protection. Never before has being fashionable been so easy! Without further ado, let’s break down what each of the rewards are, and what they’ll cost you. 

Continue reading

Getting to Know Melee Skill Trees in EiF

In today’s Friday Feature, we feature a write-up by long-time community member Randolo. In this article, Randolo goes into detail on the four different melee combat skill trees, outlining pros and cons to each, as well as some tips and tricks to make the most of the skills. Thank you Randolo!

Hello, my name is Randolo, I’ve been a member of Empire in Flames since Launch Day, playing off and on casually until taking a much more active role in the community over the past year or so. With the variety of players we have on Empire in Flames (EiF), I wanted to address some questions and constructive conversations I’ve seen popping up over the last few months in the general chat. To make things a bit clearer and assist newer players, I decided to take a thorough examination of all the unique iterations of Melee skill trees available in EiF, detailing their strengths, weaknesses, and some fun tips for each one.

Before we begin, let’s go over a few terms you should learn about Melee Combat on EiF and phrases we will use throughout this article. These universal tips should also prove helpful to you in any combat scenario.

  • Center of Being (CoB) is a defensive buff that every Melee Skill Tree can use. It’s an ability you can activate manually, or create a macro to ensure it’s constantly running and always in effect. CoB reduces the damage you take (efficacy skill mod divided by three, every melee tree has 60 efficacy, so 20% damage reduction) though you deal 25% less damage while it is active. You cannot activate CoB with another active melee buff known as Berserk.
  • Berserk is a more aggressive melee buff that increases damage output by 25% and provides an accuracy bonus, but reduces Melee and Ranged Defense by 50 and halves your secondary Defense. While Berserk is active on your character, you are immune to Intimidate – a state that would otherwise reduce your outgoing damage and reduce your secondary defense. If you activate Berserk while Intimidated, you can immediately clear the Intimidate state. While the trade off of more outgoing damage at the cost of being more susceptible to incoming damage may seem risky in some situations, you can reduce the Defense penalty and further enhance the accuracy bonuses by using Armor and/or Clothing attachments with the Berserk skill mod. Again, you will not be able to activate Berserk if you are already running CoB.
  • Toughness is a direct Melee damage reduction. One point of Toughness is 1% damage reduction incoming Melee Damage while wielding that particular weapon. For example, if you have 20 polearm Toughness, you receive a 20% damage reduction using any polearm weapon but that Toughness goes away if you pull out your pistol, carbine, one-handed sword, etc.

Another thing to keep in mind are standard location hit attacks. You have Body Hit, Leg Hit, and Head Hit, all of which have been modified to attack your target’s Health pool. Teras Kasi’s Leg and Head Hit are the only exceptions to this which each target an opponent’s Action and Mind, respectively. Bleed attacks still target their original respective pools as well, however, Fencer has quite a few additional bleeds that we’ll get into later.

You can increase your damage up to 5% by utilizing a total of +25 [Weapon] Damage mods from Skill Enhancing Attachments (also known as tapes or SEAs) and GCW Planetary Bonuses.  Teras Kasi Artists get this automatically as part of their unarmed damage skill as they level, automatically granting +25 to Unarmed Damage at Master. You will not benefit from any additional Unarmed Damage SEAs. 

Before we get into the specifics of each Melee Skill Tree, here is a brief overview of how they relate to one another in terms of Overall Damage Potential and Tanking Potential/Toughness. Our Melee Skill Trees are Fencer, Swordsman, Polearm, and Teras Kasi Artist (TKA).

Damage Capability

  1. Fencer
  2. Swordsman
  3. Pikeman
  4. Teras Kasi Artist

Tanking Capability

  1. Teras Kasi Artist
  2. Pikeman 
  3. Swordsman
  4. Fencer

Fencers have some of the best damage output of the game, but they take a significant amount of damage if they receive a hit and have to rely on Dodge to avoid incoming damage. Swordsman is second for potential damage output but is slightly tougher than Fencers. Pikeman does not deal as much damage as Swordsman and Fencer but its Toughness and sweeping area attacks are second to none, making them reliable tanks. Finally, we have Teras Kasi Artist, which does the least amount of overall damage but makes up for it by having the most significant tanking potential and access to all states. 

It is important to note that there are some specific use cases where Pikeman may be a better choice for tanking a particular fight than TKA, or Swords might be better to bring along than a Fencer. We will get into those specifics as we break down each tree; the above lists are a comprehensive overview of how they relate to damage potential and defensive potential.

Let’s jump right into it, and focus first on Fencer.

Continue reading

Friday Feature: Schisms of the Force Dev Q&A!

Schisms of the Force: Dev Q&A

Schisms of the Force was the highly anticipated update many moons in the making that debuted on May 4th, 2021, and brought the long-awaited Jedi profession to Empire in Flames. Since then, players – both new and returning – have had the opportunity to embark on the journey to becoming a Jedi and choose the path of light, dark, or somewhere in-between. As is the norm here on EiF however, the process to become a Jedi was new, different, and the profession itself differs from what someone might remember from Live. The secrets of the unlock and progression journey were also kept a complete secret to everyone but Lead Developer Halyn. After weeks of community trial and error, exploration, and crazy theory crafting, the first Master Jedi entered EiF on June 3rd but much of the intricacies of the profession, and what it took to being released, were as yet unknown. In this iteration of the Friday Feature, we got a more in-depth look behind the scenes with developers Halyn, Anishor, Abi, and Demiurge, and learned just what went into the making of Schisms of the Force, and what players can expect to see in the future. For those of you that have not completed the unlock process and want to maintain the mystery, be aware that there are significant spoilers ahead. If not, read on!

Continue reading

Axkva Min! An EiF Spin!

Once again, an Empire in Flames takes content from Star Wars Galaxies and puts its own unique spin on it. Below is the write up of Axkva Min, a heroic instance EiF Style by one of our players, Jeil Tain.


Axkva Min has recently been patched in with full loot tables and now it’s time to begin your journey into the instance and defeat the Nightsister threat.

You will need to complete a one-time quest to enter the dungeon. Speak to your respective factional quest giver to obtain the unlock.

Neutral Players will need to speak with Dr. Chelli Lona Aphra in Mos Eisley.

She can be found inside a guildhall at /way 3480 -4684
Her specific waypoint is /way 3475 -4665


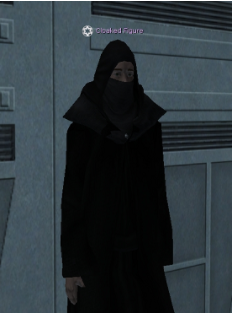
Imperial Players will need to speak with a Cloaked Figure on the Imperial Star Destroyer on Kuat.

Access to the ISD can be found at /way 4493 5449
His specific waypoint is /way 3814 4922

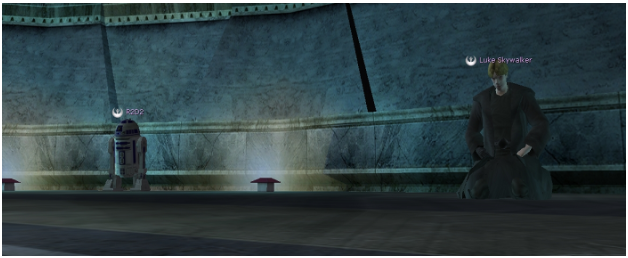
New Republic players will need to speak with Luke Skywalker in the Senate Building on Hanna City, Chandrila.

Senate Building can be found at /way 500 -2935
His specific waypoint is /way 520 -2915


The quest giver instructs you to travel to Dathomir. With a group in hand [5], make your way down the Nightsister Stronghold POI Cave. At the bottom you find the Prison door. Make your way inside when all parties are ready, as you will only have 40 minutes once inside. Additionally if the entire party wipes, the instance is over. At the time of writing this guide store your pets prior to entering the instance. Only 1 person needs to access the door.

The Chamber Door can be found at /way -3915 80

Key Tips

  • Bring Disease & Bleed Resist Foods/Buffs and Cures if possible.

Nandina & Gorvo

The first challenge is a pair of bosses. They can be killed in either order, but combat with one engages the other.

  • Split Gorvo from Nadina, roughly 30-35m. This will require two “Tanks.” They have large AoE attacks and stacking them together will lead to a total party kill.
  • Gorvo uses an AoE Knockdown effect as well as Area Disease.
  • Nandina uses a series of force and fencer attacks, most notable is Area Bleeds.
  • Whichever your party chooses to kill first, make sure all damage dealers focus on the same target. Long engagements can reduce survivability in the later stages of the instance due to encroaching battle fatigue. 

Lelli Hi

The second challenge within the Prison, Lelli Hi, will require the party to be mobile and attentive to their surroundings.

  • At intervals throughout the fight, Lelli will spawn “Mushrooms” underneath all players in the party.
    • These Mushrooms have a short fuse and will explode causing massive damage.
    • We recommend keeping your character in movement throughout the entire fight, so as to avoid animation lock when performing abilities which would prevent you from running away from the Mushroom.
    • Lelli Hi is known to use the Swordsman suite of abilities and liked to Intimidate her foes.

Kimaru

The third challenge, Kimaru, can pose a challenge much like Lelli, if you fail to move out of dangerous effects.

  • Throughout the engagement, Kimaru will unleash portals of fire and small storms of electricity. 
    • You need to avoid standing in these effects for any more than a split moment, as prolonged exposure leads to death. While timing tends to be slightly more forgiving than the Mushrooms in the previous fight, the Electrical storms are difficult to see, so you need to keep your eyes open.
  • Kimaru is known to use the Swordsman suite of abilities, but also has the ability to Bleed her targets.

Suin Chalo

The final challenge prior to fighting Axkva herself; Suin calls upon her trusted warriors to strike hard and true.

  • Suin will randomly call forth one of four possible warriors to assist her during the battle. 
    • These Nightsisters need to be dealt with very quickly, as their damage output is beyond the sustainability of a Doctor’s ability to heal.
    • Hur’dem is vulnerable to Acid.
    • Doum is vulnerable to Heat.
    • Oxvul is vulnerable to Electricity.
    • Ekomal is vulnerable to Cold.
  • Suin is known to use the Swordsman suite of abilities and will use an area Intimidate attack on occasion. 

Axkva Min

The namesake of this heroic instance, Axkva Min, is the reason the Prison exists and is the final encounter. She briefly speaks of a dark master and offers you a position at her side…

  • Axkva primary mechanic is to imprison group members and drain them of their life.
    • At random, party members will be encased in a red Crystal which needs to be destroyed. If left alone, the Crystal will continue to damage its target until they are dead.
    • Occasionally some players will feel a ploom of damage as green force effects spew forth. There is nothing to be done to avoid this, we only recommend players stay topped off on health as much as possible. 
    • Axkva has been witnessed to use Swordsman suite abilities and will constantly Intimidate or Stun her target.

I hope this little guide helps you and your friends succeed. I would also like to note that this guide was written with the expectation that overall you understand this is endgame content and should have defensive foods, buffs, and various proper equipment. 

-Jeil


Friday Feature – Creature Handler Revamp

Creature Handler is one of the most unique and popular aspects of Star Wars Galaxies. Unfortunately, Creature Handler is seldom seen as “competitive” – its creatures are relatively low in damage and can’t take punishment like a properly defensively-stacked player can.

The Empire in Flames team has been well aware of the problems with Creature Handler for some time, but because of other development priorities (the Galactic Civil War, new content, Jedi), the team chose to wait and hash out a proper revamp to bring creature handlers back into their own in such a way to make the experience rewarding without nerfing anyone or anything…and leaving open the possibility of further adjustments that don’t include a “pre-nerf” situation.

Design Dilemnas

Fixing creature handler requires solving several problems. The foremost is that EiF’s combat has been vastly overhauled; simply buffing individual pets either means invalidating “normal” pets, or completely throwing out PvE balance.

Another problem is with pet levels – creature handler by design allows a player to have multiple low-level pets or one big pet. Actual combat experience shows players tend to go with big pets because they find anything lower than level 50 isn’t worth it.

Finally, we need to ensure that we can adjust balance going forward; if we can’t, we have the potential to completely break EiF’s combat system.

An Old Take on Creature Handler with a New Twist

At SWG launch, Creature Handler included two skill modifiers that were unrelated: “Additional Pets” and “Max Level of Pets”. The “Additional Pets” modifier was used to determine how many pets a creature handler could have active; “Max Level of Pets” determined how powerful their pets could be.

Early pre-CU made Creature Handler a must-have – players could run around with three full-grown rancors (at the time, extremely powerful compared to players) and dominate virtually everything. SOE promptly nerfed the system, making “Max Level of Pets” cumulative – instead of each pet out having to be under the max level cap, the total levels had to be under the level cap.

The EiF team looked at changing the system back to the pre-nerf situation – after all, three pet rancors under the EiF system would hardly be overpowered. However, it created its own issue – the only pets players would want to use were the most powerful. Other pets, which may be fun, would be ignored.

A Full Solution

Creature Handlers are still restricted by the “Max Level of Pets” modifier. (A master creature handler, post-revamp, will have a rating of 75; Singing Mountain Clan players get an additional +5.) That “max level” is calculated against a creature’s base level.

The pet, when summoned and if full-grown, will scale in level to the player’s “Max Level of Pets”. For example, a Narglatch Guardian is CL25. When summoned by a master Creature Handler, he will enter the world at CL75, with roughly appropriate damage and HAM.

Naturally lower-level pets, when summoned at high levels, have a higher damage rating and more HAM than a pet that’s naturally at that higher level. However, naturally higher-level pets have better accuracy and better armor resists, making them more likely to hit and easier to keep healed.

And with “Additional Pets” no longer checking against the sum of “Max Level of Pets”, triple pets of various types is now a potentially powerful solution.

Not Just the Creatures, but the Handlers, Too

Even with the changes, we wanted to add more choice – and improvement options – for creature handlers.

To that end, we did a quick revamp on embolden and enrage.

Embolden now provides a taken-damage reduction to a handler’s pets, along with a small increase in pet accuracy.

Enrage provides a done-damage boost to a handler’s pets, along with a large increase in pet accuracy.

Embolden and enrage are mutually-exclusive; only one can be active at a time. Will your pets do more damage or take less?

Finally, we added a new SEA type – “Max Level of Pets”. This SEA is not used for control calculations; a player with no CH can’t use it to call a CL35 pet, for example, but it is used to calculate a pet’s adjusted level.

What Will You Do?