Friday Feature! Powerups: Cornerstone of an Empire

In today’s Friday Feature, Demiurge once again provides insight into another important aspect of crafting – powerups! So without further ado…

—-

Powerups: Cornerstone of an Empire

Last week, I wrote about Armorsmithing on EiF.  This week I wanted to write another article to address questions, opinions, and concerns about crafting in general in SWG.  Crafting comes in many forms in this game.  More and more often, I hear people commenting on how it’s impossible to gain a foothold into it or compete with established players.  This article is intended to specifically address that misconception.

Most people who have played on EiF for any length of time know who I am.  I am primarily associated with the crafting of armor, even though I also make weapons, artisan wares, some architect items, and every now and then clothing, BE, and medical items too.  But here’s one of my biggest secrets: I make a large chunk of my credits crafting an item that a new player can make within a day or two of character creation… Powerups.

So just like with last week’s write-up, I will break down what it takes to craft them.  As you might suspect, Powerups are one of the easiest items to craft in the game.  There are no subcomponents and each craft takes a combined 10 resources: 6 minerals and 4 chemicals.

Here are the essential factors that will determine your success or failure:

  1. Your resources – This is the single most important factor in determining a Powerup’s statistics.
  2. The crafter – Are you a Master Artisan?  That’s all you need.  No need for any extra tapes.  No need to be anything other than a 10 point crafter.
  3. Your crafting tool – The stats of your crafting tool matter (again, the crafting station does not). You will want a Weapon, Droid, and General Item crafting tool.
  4. Where are you performing the craft – Crafting in a player city is always the most desirable way to make something.  As with other types of crafting, Research Centers are the best location to craft a powerup (as each individual craft will use a ton of single-point experimentation rolls).
  5. PATIENCE – I mention this one last, but it is really just as important as the resources you use.  This is because it takes a tremendous amount of patience to craft, scrap a craft that isn’t exactly what you want, and try again.  I have been known to scrap over a thousand attempts for a single one I like enough to turn into a factory schematic.

Food and Drink are irrelevant for crafting powerups, as are Skill Enhancing Attachments.  They are not needed, and even without them, you will still be able to craft server-capped powerups. Please note: while it is not important to have more than 10 experimentation points for powerup crafting, having +25s to both assembly and especially experimentation will still be beneficial in the sense of improving each experimentation roll to help with its quality… but it is not mandatory. Before I get into the discussion on how to make a powerup, I would like to share an old website that has a lot of valuable information pertaining to the crafting of powerups.  I will fill in the blanks as they apply to EiF, since the website’s data is not 100% accurate for us.  Nevertheless, Agock wrote an excellent guide for its time, and I still reference it on occasion to remind myself what stat combinations are possible.

https://www.swgemu.com/archive/scrapbookv51/data/20070205033706/index.html

What Exactly is a Powerup?

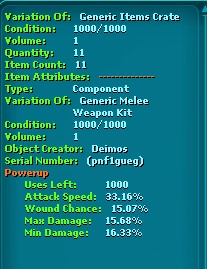
A powerup is a simple crafted item that is added to any normal weapon you might want to use (heavy Commando weapons such as a flame thrower or acid rifle and a Bounty Hunter’s Light Lightning Cannon are examples of weapons that can not be augmented with a powerup).  A powerup consists of a primary stat modification, and any number of smaller, secondary stat modifications (anywhere from zero to five, depending on the type of powerup crafted).  The primary stat modification is the major upgrade.  For purposes of example, please see the picture below:

This is a basic, 4-stat melee powerup.  The primary modification is the first stat listed (Attack Speed).  The other stats listed below are secondary modifications.  EiF has modified the “uses left” stat for our server.  On any other server I’ve seen (including live), powerups each have 100 uses.  Here, they last 10 times as long (1000 uses).  This is a major quality of life improvement for players because, for some end-game content (or PvP), it would be extremely easy to blow through those 100 uses and have to worry about placing another PuP (short for Powerup) on your weapon, mid-battle.  As someone who has crafted them for years, I will also tell you that they still sell daily.. so it is not a market killer (as you simply sell them for more than elsewhere).

Continue reading

EiF Armor Crafting 101

In today’s feature, we bring you a very in-depth write-up on armorsmithing by the illustrious armor crafter Demiurge. In this article, Demi outlines what it takes to be a successful armorsmith on Empire in Flames as well as give insight into the changed systems you’ll find, some best practices, and tools of the trade to help any aspiring crafters become the best they can be and in his words, “knock him off of his pedestal”. Thank you, Demiurge!

——

EiF Armor Crafting 101

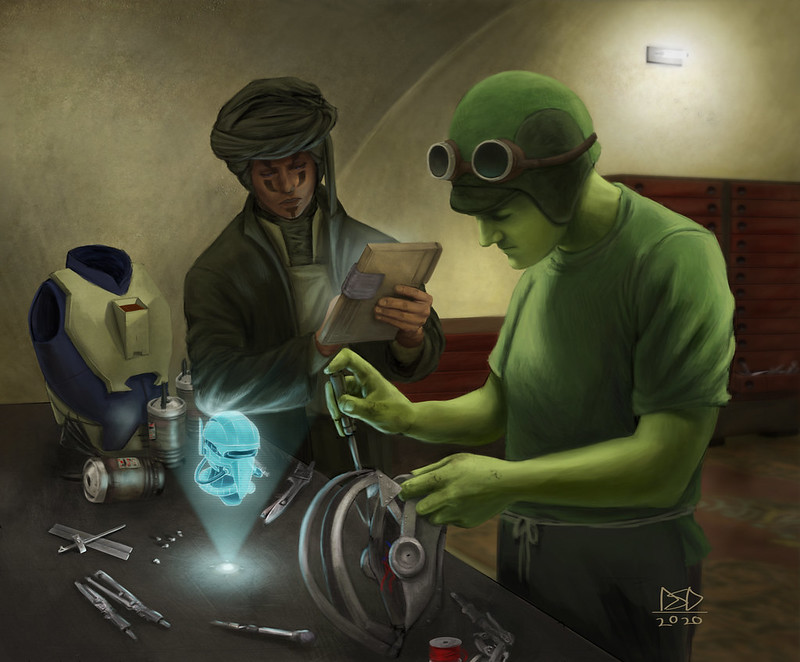
Artwork courtesy of AgentOrangeJuice

Introduction

The purpose of this guide is to explain how armor crafting works on EiF and demonstrate how it is different from any other server you might have played on.  I intend to explain every important aspect and consideration in order to teach you how to craft armor with the exact same stats that I am able to currently make.  I have been making armor continuously on our server for the last three years.  In that time, due to the among of sheer work I’ve put into it, I believe I have become the dominant armor crafter here.  I hope to teach and inspire you to be able to match what I am capable of, and ultimately to surpass me.

For those of you who have experience crafting armor on any other SWG server, a good bit of this will be familiar or previously understood the content.  But what makes armor different on EiF is the usage of armor cores.  The purpose of an armor core is to allow all types of armor to be of similar or equal stats.  A core consists of up to three armor segments, with each segment containing zero to nine armor layers.  Armor on EiF requires one to five armor cores, depending on the armor type.  This means that, unlike other servers where specific segment types are required for its corresponding armor type (composite or advanced composite segments to go into any piece of composite), the same armor core can be used in ANY armor type.  This modification to the system allows basically all armor types to be craftable within a very tight range of stats between one another (I will explain further below) and opens the door to a wide array of looks, styles, and viable options.  You won’t just see people running around in RIS or Composite.

Before I break down layers, segments, and cores further, it is important for you to understand how a piece of armor gets its stats.  On EIF, 95% of the stats provided to a final, crafted piece of armor comes from the armor core itself.  The remaining 5% are derived from the final assembly resources that are specific to a type of armor.  For example, crafting a piece of RIS would require (among other things), a specific resource like Platinite Copper, while a piece of Bone armor would require a generic resource such as “metal”.  This fact alone allows Bone armor to have a much wider array of possible resources to satisfy that requirement.  This is critical because all resources have min and max possible stats in several key areas that are very important to armor.  Plantinite has a less advantageous range of stats than many other types of metal, such as steel, iron, or even other types of copper.  This deviation in final assembly resource requirements is what allows a range of 1-5% variance between what you might see on the final crafted product (speaking specifically on the final types of damage resistances).  The maximum craftable resist per damage type is a theoretical 55%.  If perfectly sliced by a Smuggler, this value can reach 60%.

Halyn, and sometimes in conjunction with various staff members, has made numerous design decisions that set EiF apart from how things are done elsewhere.  In an attempt to completely eliminate spawn camping, the team has removed the ability to use looted components from various mobs as augments to crafted armor pieces.  Items like Janta Hides, Rancor Hides, etc, are not used in armor crafting here.  Therefore, the essential factors that determine your final product are:

  1. Your resources – This is the single most important factor in determining armor’s final quality.
  2. The crafter – Are you a 12 point smith, fully taped for assembly and experimentation?
  3. Your crafting tool – The stats of your crafting tool matter (while the stats on the crafting station itself does not).  The maximum stat of a crafting tool is a 15.0
  4. Food/Drink – Foods such as Pyollian Cake will offer a decent assembly bonus to your crafting roll, helping your chances of crafting an amazing assembly.  Drinks such as Bespin Port will do the exact same thing for each of your experimentation rolls.  Experimentation is the more desired buff of the two (though both can be utilized at the same time).
  5. Where you perform the craft – Crafting in a player city is always the most desirable way to make something.  A level 5 player city gains the ability to set a “city bonus”.  Two of these (Manufacturing Center = Assembly bonus, and Research Center = Experimentation bonus) grants bonuses to every craft that occurs within its city limits.

These are the five factors to keep in mind when you craft something.  Other factors, such as a crafter’s current battle fatigue or wounds do not factor into the crafting equation!  With this in mind, let’s look at the single most important factor in your crafting process: the resources used.

Continue reading

Current Collections

Hey all!

With the recent patch, the team unleashed another wave of Collections on the server. Some collections have pieces that are scattered across the galaxy, while others are centralized on a particular planet. Below, we’ll list out the forty-six click collections that are currently available so you have a better idea of what to look for, and what you might have missed so far (but don’t expect to find the item locations here, that’s for the community to discover). The list will be divided into two categories – collections with items scattered throughout various planets, and collections that are specific to an individual planet. 


Across the Galaxy

Antique Two-handed Sword

The original Tulrus Sword was constructed from a mighty beast that wandered the volcanic planet of Mustafar, but other bone-like weapons based on it were crafted all over the galaxy.
Reward: Decoration Item

Antique Blaster Carbine Collection

The Firestar 10-K blaster carbine is an old design stretching back decades. Older version of the carbines have been inherited by the next generation, making the weapon a somewhat common sight in the Outer Rim.
Reward: Decoration Item

Antique Bladed Knuckler Collection

Simple knuckler designs have changed little in centuries; old knucklers are still perfectly usable if they’ve been properly preserved.
Reward: Decoration Item

Antique Blaster Pistol Collection

The Intimidator blaster pistol is an old design, stretching back decades. While some claim the old weapon is too large to be a practical sidearm, the early-production versions of these weapons are highly prized by collectors.
Reward: Decoration Item

Antique Polearm Collection

The Kashyyyk Blade Stick was a favorite among the fierce Wookiee warriors and berserkers, though many copied the design across the galaxy to fit the owner’s personal needs
Reward: Decoration Item

Antique Sniper Rifle Collection

The military may have appreciated the destructive capabilities of this antique sniper rifle, but they cared little for the history of how it was a part of a revolution won by blood to free a small nation where the primary musical instrument were pipes.
Reward: Decoration Item

Antique Sword Collection

Sword technology has changed little in millennia; old weapons, properly maintained, are just as deadly as a newly-produced weapon.
Reward: Decoration Item

Beetle Buster Collection

Entomological research can be rewarding if you know where to look.
Reward: Decoration Item

Bouquet Collection

The language of flowers is complex, subtle, and regional. Miscommunication is common.
Reward: Decoration Item

Bubbling Rock Collection

In a vast galaxy, there are many oddities to be found.
Reward: Decoration Item

Burning Rock Collection

In a vast galaxy, there are many strange things to be found.
Reward: Decoration Item

Durni Infestation Collection

Cute and seemingly harmless, durnis can rapidly reproduce and overrun an area if careful checks aren’t kept on their population.
Reward: Decoration Item

Dust Durni Collection

Even in a galaxy far, far away, lack of regular dusting leads to buildups.
Reward: Decoration Item

Family Heirloom Collection

While much of your family tree is known to you, there are blanks that need to be filled.
Reward: Decoration Item

Fishing Expedition Collection

The galaxy is a wide and wild place. A small group of sentients travel the galaxy searching for exotic fish to catch.
Reward: Decoration Item

Glass Shelf Collection

A set of crafting books, scattered across the galaxy, could unlock the key to custom crafting glass shelves for a person’s home.
Reward: Crafting Schematic

Glowing Rock Collection

In a vast galaxy, there are many unexplainable things to be found.
Reward: Decoration Item

Imperial Scout Trooper Armor Collection

This armor represents the most independent units of the Imperial Stormtrooper Corps – scouts often operate individually or in pairs.
Reward: Title

Imperial Shock Trooper Armor Collection

This armor represents the elite of the Imperial Stormtrooper Corps – soldiers trained in non-standard equipment with heavier armor.
Reward: Title

Imperial Stormtrooper Armor Collection

This armor is one of the most recognizable symbols of the New Order.
Reward: Title

Medical Supplies Collection

Doctors of the galaxy keep every hero, big and small, going. Without them, there would be no tales to tell.
Reward: Decoration Item

Might of the Empire Collection

While the Galactic Empire’s rule over the galaxy has been brief, especially when compared to the preceding Old Republic, there are many symbols of its power and authority.
Reward: Decoration Item

Pazaak Collection

Playable just about anywhere, Pazaak is popular at cantinas, casinos, or on ships to pass the time.
Reward: Crafting Schematic

Republic Assault Armor Collection

Scattered across the galaxy, this armor is just one representation of the Rebel soldiers who fought an Empire against impossible odds.
Reward: Title

Republic Battle Armor Collection

Scattered across the galaxy, this armor is just one representation of the Rebel soldiers who fought an Empire against impossible odds.
Reward: Title

Republic Marine Armor Collection

Scattered across the galaxy, this armor is just one representation of the Rebel soldiers who fought an Empire against impossible odds.
Reward: Title

Steaming Rock Collection

In a vast galaxy, there are many curiosities to be found.
Reward: Decoration Item

Stuffed Dewback Collection

Some sentients in the galaxy have an odd habit of reducing common beasts of burden in the galaxy to cute and cuddly plushes.
Reward: Decoration Item

Stuffed Rancor Collection

Some sentients in the galaxy have an odd habit of reducing the most fearsome creatures in the galaxy to cute and cuddly toys.
Reward: Decoration Item

Stuffed Tauntaun Collection

Some sentients in the galaxy have an odd habit of reducing common beasts of burden in the galaxy to cute and cuddly toys.
Reward: Decoration Item

Stuffed Wampa Collection

Some sentients in the galaxy have an odd habit of reducing the most fearsome creatures in the galaxy to cute and cuddly toys.
Reward: Decoration Item

Will of the Rebellion Collection

Struggling against the powers of a galaxy-spanning Empire, the Rebel Alliance’s success was, in part, a product of pure will to succeed and a steadfast refusal to accept anything but victory.
Reward: Decoration Item

Planet Particular

Corellia Lore Collection

A prominent world in the Core, Corellia is best known for its shipyards – but there is far more to the planet than just its shipbuilding capacity.
Reward: Decoration Item

Coruscant Lore Collection

Also known as the Imperial Center, Coruscant is a city-covered planet home to trillions of people. It is considered the heart of the galaxy with a rich history before it had was covered in artificial material.
Reward: Decoration Item

Dantooine Lore Collection

Far removed from most galaxy traffic, the remote world of Dantooine in the Outer Rim is home to small farms, old ruins, and older secrets.
Reward: Decoration Item

Dathomir Lore Collection

A world of darkness and witches, Dathomir’s influence on history far outweighs its remote and hidden location.
Reward: Decoration Item

Hoth Meteorites Collection

The Hoth system is a hive of asteroid activity. Small asteroids, in the forms of meteorites, often collide with planets throughout the system, including the sixth planet where the Rebel Alliance once called Echo Base their home.
Reward: Decoration Item

Hoth Frozen Tauntaun Collection

On the icy planet of Hoth, even the native wildlife can freeze if caught outdoors in storms. Surveying these dead creatures could be useful.
Reward: Decoration Item

Kuat Lore Collection

Surrounded by the large, man-made ring of shipyards, and guarded by a large Imperial Fleet, the industrial planet of Kuat is known for its production of notable warships and the prestigious Kuat Drive Yards.
Reward: Decoration Item

Lok Lore Collection

Home to brutal sandstorms, barren plains, lifeless rivers, and aggressive fauna, Lok would not be considered a welcoming planet – which may be perfect for those that wish to hide secrets in the wasteland.
Reward: Decoration Item

Naboo Lore Collection

A gem of the Outer Rim, Naboo largely went unnoticed until surveyors realized the easy wealth of minable plasma. Its rise to prominence led to trade conflicts with the Trade Federation and, arguably, eventually the Clone Wars.
Reward: Decoration Item

Restuss Debris Collection

Several years ago, a war waged between the Galactic Empire and the Rebel Alliance over the city of Restuss on the moon of Rori. There are still scars and debris left from the battle that could be worth exploring.
Reward: Title

Rori Lore Collection

King Narmle’s vision for Rori included it becoming an argicultural hub similiar to Taanab. When that plan did not come to fruition, Narmle left to explore the Outer Rim and vanished.
Reward: Decoration Item

Taanab Lore Collection

A world of spawling meadows, mild climates, and abundant sunlight, the planet Taanab in the Inner Rim is home to many agricultural projects that feed billions across the galaxy
Reward: Decoration Item

Tatooine Lore Collection

A small dustbowl in the far reaches of the Outer Rim, the planet of Tatooine is easy to overlook. However, the planet has a deep and rich history worth exploring.
Reward: Decoration Item

Yavin IV Lore Collection

A jungle-covered moon that orbited the gas giant Yavin Prime. It was the homeworld for many Sith Lords, would-be conquerors, galactic menaces, and sparked the hope of rebellion against an impossible foe.
Reward: Decoration Item


The list won’t end here, though. While this is all that is currently available, the team will continue to work to bring new Collections and rewards to the game, so stay tuned!


— Mina
 

Axkva Min! An EiF Spin!

Once again, an Empire in Flames takes content from Star Wars Galaxies and puts its own unique spin on it. Below is the write up of Axkva Min, a heroic instance EiF Style by one of our players, Jeil Tain.


Axkva Min has recently been patched in with full loot tables and now it’s time to begin your journey into the instance and defeat the Nightsister threat.

You will need to complete a one-time quest to enter the dungeon. Speak to your respective factional quest giver to obtain the unlock.

Neutral Players will need to speak with Dr. Chelli Lona Aphra in Mos Eisley.

She can be found inside a guildhall at /way 3480 -4684
Her specific waypoint is /way 3475 -4665


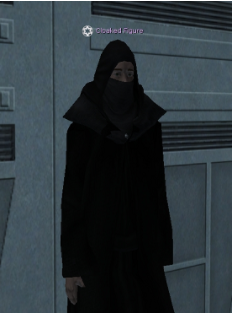
Imperial Players will need to speak with a Cloaked Figure on the Imperial Star Destroyer on Kuat.

Access to the ISD can be found at /way 4493 5449
His specific waypoint is /way 3814 4922

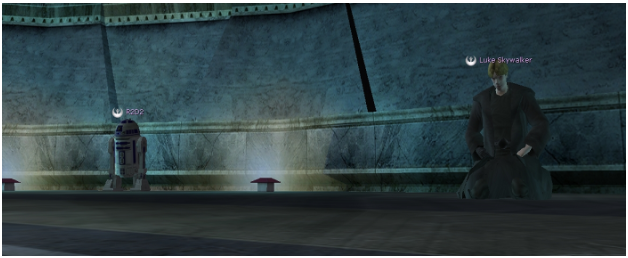
New Republic players will need to speak with Luke Skywalker in the Senate Building on Hanna City, Chandrila.

Senate Building can be found at /way 500 -2935
His specific waypoint is /way 520 -2915


The quest giver instructs you to travel to Dathomir. With a group in hand [5], make your way down the Nightsister Stronghold POI Cave. At the bottom you find the Prison door. Make your way inside when all parties are ready, as you will only have 40 minutes once inside. Additionally if the entire party wipes, the instance is over. At the time of writing this guide store your pets prior to entering the instance. Only 1 person needs to access the door.

The Chamber Door can be found at /way -3915 80

Key Tips

  • Bring Disease & Bleed Resist Foods/Buffs and Cures if possible.

Nandina & Gorvo

The first challenge is a pair of bosses. They can be killed in either order, but combat with one engages the other.

  • Split Gorvo from Nadina, roughly 30-35m. This will require two “Tanks.” They have large AoE attacks and stacking them together will lead to a total party kill.
  • Gorvo uses an AoE Knockdown effect as well as Area Disease.
  • Nandina uses a series of force and fencer attacks, most notable is Area Bleeds.
  • Whichever your party chooses to kill first, make sure all damage dealers focus on the same target. Long engagements can reduce survivability in the later stages of the instance due to encroaching battle fatigue. 

Lelli Hi

The second challenge within the Prison, Lelli Hi, will require the party to be mobile and attentive to their surroundings.

  • At intervals throughout the fight, Lelli will spawn “Mushrooms” underneath all players in the party.
    • These Mushrooms have a short fuse and will explode causing massive damage.
    • We recommend keeping your character in movement throughout the entire fight, so as to avoid animation lock when performing abilities which would prevent you from running away from the Mushroom.
    • Lelli Hi is known to use the Swordsman suite of abilities and liked to Intimidate her foes.

Kimaru

The third challenge, Kimaru, can pose a challenge much like Lelli, if you fail to move out of dangerous effects.

  • Throughout the engagement, Kimaru will unleash portals of fire and small storms of electricity. 
    • You need to avoid standing in these effects for any more than a split moment, as prolonged exposure leads to death. While timing tends to be slightly more forgiving than the Mushrooms in the previous fight, the Electrical storms are difficult to see, so you need to keep your eyes open.
  • Kimaru is known to use the Swordsman suite of abilities, but also has the ability to Bleed her targets.

Suin Chalo

The final challenge prior to fighting Axkva herself; Suin calls upon her trusted warriors to strike hard and true.

  • Suin will randomly call forth one of four possible warriors to assist her during the battle. 
    • These Nightsisters need to be dealt with very quickly, as their damage output is beyond the sustainability of a Doctor’s ability to heal.
    • Hur’dem is vulnerable to Acid.
    • Doum is vulnerable to Heat.
    • Oxvul is vulnerable to Electricity.
    • Ekomal is vulnerable to Cold.
  • Suin is known to use the Swordsman suite of abilities and will use an area Intimidate attack on occasion. 

Axkva Min

The namesake of this heroic instance, Axkva Min, is the reason the Prison exists and is the final encounter. She briefly speaks of a dark master and offers you a position at her side…

  • Axkva primary mechanic is to imprison group members and drain them of their life.
    • At random, party members will be encased in a red Crystal which needs to be destroyed. If left alone, the Crystal will continue to damage its target until they are dead.
    • Occasionally some players will feel a ploom of damage as green force effects spew forth. There is nothing to be done to avoid this, we only recommend players stay topped off on health as much as possible. 
    • Axkva has been witnessed to use Swordsman suite abilities and will constantly Intimidate or Stun her target.

I hope this little guide helps you and your friends succeed. I would also like to note that this guide was written with the expectation that overall you understand this is endgame content and should have defensive foods, buffs, and various proper equipment. 

-Jeil


Friday Feature – Creature Handler Revamp

Creature Handler is one of the most unique and popular aspects of Star Wars Galaxies. Unfortunately, Creature Handler is seldom seen as “competitive” – its creatures are relatively low in damage and can’t take punishment like a properly defensively-stacked player can.

The Empire in Flames team has been well aware of the problems with Creature Handler for some time, but because of other development priorities (the Galactic Civil War, new content, Jedi), the team chose to wait and hash out a proper revamp to bring creature handlers back into their own in such a way to make the experience rewarding without nerfing anyone or anything…and leaving open the possibility of further adjustments that don’t include a “pre-nerf” situation.

Design Dilemnas

Fixing creature handler requires solving several problems. The foremost is that EiF’s combat has been vastly overhauled; simply buffing individual pets either means invalidating “normal” pets, or completely throwing out PvE balance.

Another problem is with pet levels – creature handler by design allows a player to have multiple low-level pets or one big pet. Actual combat experience shows players tend to go with big pets because they find anything lower than level 50 isn’t worth it.

Finally, we need to ensure that we can adjust balance going forward; if we can’t, we have the potential to completely break EiF’s combat system.

An Old Take on Creature Handler with a New Twist

At SWG launch, Creature Handler included two skill modifiers that were unrelated: “Additional Pets” and “Max Level of Pets”. The “Additional Pets” modifier was used to determine how many pets a creature handler could have active; “Max Level of Pets” determined how powerful their pets could be.

Early pre-CU made Creature Handler a must-have – players could run around with three full-grown rancors (at the time, extremely powerful compared to players) and dominate virtually everything. SOE promptly nerfed the system, making “Max Level of Pets” cumulative – instead of each pet out having to be under the max level cap, the total levels had to be under the level cap.

The EiF team looked at changing the system back to the pre-nerf situation – after all, three pet rancors under the EiF system would hardly be overpowered. However, it created its own issue – the only pets players would want to use were the most powerful. Other pets, which may be fun, would be ignored.

A Full Solution

Creature Handlers are still restricted by the “Max Level of Pets” modifier. (A master creature handler, post-revamp, will have a rating of 75; Singing Mountain Clan players get an additional +5.) That “max level” is calculated against a creature’s base level.

The pet, when summoned and if full-grown, will scale in level to the player’s “Max Level of Pets”. For example, a Narglatch Guardian is CL25. When summoned by a master Creature Handler, he will enter the world at CL75, with roughly appropriate damage and HAM.

Naturally lower-level pets, when summoned at high levels, have a higher damage rating and more HAM than a pet that’s naturally at that higher level. However, naturally higher-level pets have better accuracy and better armor resists, making them more likely to hit and easier to keep healed.

And with “Additional Pets” no longer checking against the sum of “Max Level of Pets”, triple pets of various types is now a potentially powerful solution.

Not Just the Creatures, but the Handlers, Too

Even with the changes, we wanted to add more choice – and improvement options – for creature handlers.

To that end, we did a quick revamp on embolden and enrage.

Embolden now provides a taken-damage reduction to a handler’s pets, along with a small increase in pet accuracy.

Enrage provides a done-damage boost to a handler’s pets, along with a large increase in pet accuracy.

Embolden and enrage are mutually-exclusive; only one can be active at a time. Will your pets do more damage or take less?

Finally, we added a new SEA type – “Max Level of Pets”. This SEA is not used for control calculations; a player with no CH can’t use it to call a CL35 pet, for example, but it is used to calculate a pet’s adjusted level.

What Will You Do?