
In today’s feature, we bring you a very in-depth write-up on armorsmithing by the illustrious armor crafter Demiurge. In this article, Demi outlines what it takes to be a successful armorsmith on Empire in Flames as well as give insight into the changed systems you’ll find, some best practices, and tools of the trade to help any aspiring crafters become the best they can be and in his words, “knock him off of his pedestal”. Thank you, Demiurge!
——
EiF Armor Crafting 101
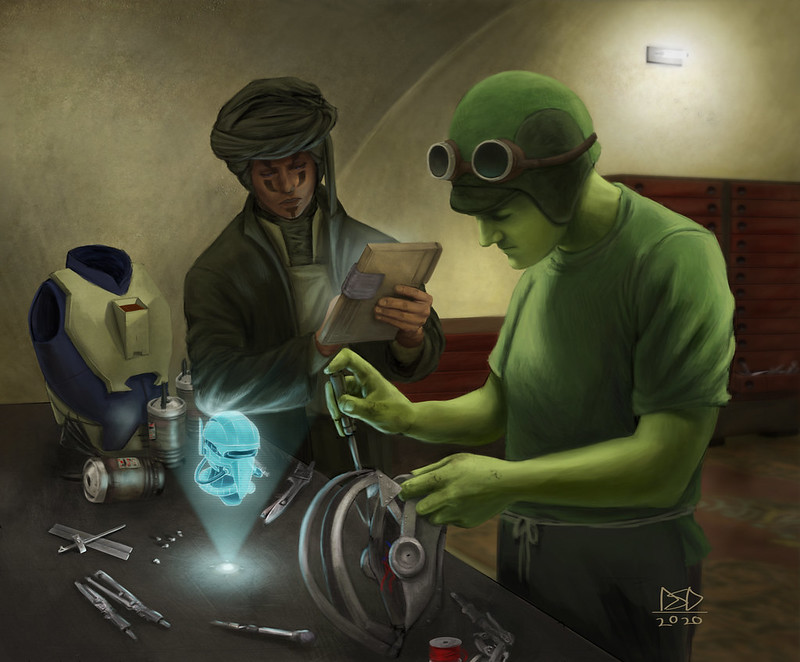
Artwork courtesy of AgentOrangeJuice
Introduction
The purpose of this guide is to explain how armor crafting works on EiF and demonstrate how it is different from any other server you might have played on. I intend to explain every important aspect and consideration in order to teach you how to craft armor with the exact same stats that I am able to currently make. I have been making armor continuously on our server for the last three years. In that time, due to the among of sheer work I’ve put into it, I believe I have become the dominant armor crafter here. I hope to teach and inspire you to be able to match what I am capable of, and ultimately to surpass me.
For those of you who have experience crafting armor on any other SWG server, a good bit of this will be familiar or previously understood the content. But what makes armor different on EiF is the usage of armor cores. The purpose of an armor core is to allow all types of armor to be of similar or equal stats. A core consists of up to three armor segments, with each segment containing zero to nine armor layers. Armor on EiF requires one to five armor cores, depending on the armor type. This means that, unlike other servers where specific segment types are required for its corresponding armor type (composite or advanced composite segments to go into any piece of composite), the same armor core can be used in ANY armor type. This modification to the system allows basically all armor types to be craftable within a very tight range of stats between one another (I will explain further below) and opens the door to a wide array of looks, styles, and viable options. You won’t just see people running around in RIS or Composite.
Before I break down layers, segments, and cores further, it is important for you to understand how a piece of armor gets its stats. On EIF, 95% of the stats provided to a final, crafted piece of armor comes from the armor core itself. The remaining 5% are derived from the final assembly resources that are specific to a type of armor. For example, crafting a piece of RIS would require (among other things), a specific resource like Platinite Copper, while a piece of Bone armor would require a generic resource such as “metal”. This fact alone allows Bone armor to have a much wider array of possible resources to satisfy that requirement. This is critical because all resources have min and max possible stats in several key areas that are very important to armor. Plantinite has a less advantageous range of stats than many other types of metal, such as steel, iron, or even other types of copper. This deviation in final assembly resource requirements is what allows a range of 1-5% variance between what you might see on the final crafted product (speaking specifically on the final types of damage resistances). The maximum craftable resist per damage type is a theoretical 55%. If perfectly sliced by a Smuggler, this value can reach 60%.
Halyn, and sometimes in conjunction with various staff members, has made numerous design decisions that set EiF apart from how things are done elsewhere. In an attempt to completely eliminate spawn camping, the team has removed the ability to use looted components from various mobs as augments to crafted armor pieces. Items like Janta Hides, Rancor Hides, etc, are not used in armor crafting here. Therefore, the essential factors that determine your final product are:
- Your resources – This is the single most important factor in determining armor’s final quality.
- The crafter – Are you a 12 point smith, fully taped for assembly and experimentation?
- Your crafting tool – The stats of your crafting tool matter (while the stats on the crafting station itself does not). The maximum stat of a crafting tool is a 15.0
- Food/Drink – Foods such as Pyollian Cake will offer a decent assembly bonus to your crafting roll, helping your chances of crafting an amazing assembly. Drinks such as Bespin Port will do the exact same thing for each of your experimentation rolls. Experimentation is the more desired buff of the two (though both can be utilized at the same time).
- Where you perform the craft – Crafting in a player city is always the most desirable way to make something. A level 5 player city gains the ability to set a “city bonus”. Two of these (Manufacturing Center = Assembly bonus, and Research Center = Experimentation bonus) grants bonuses to every craft that occurs within its city limits.
These are the five factors to keep in mind when you craft something. Other factors, such as a crafter’s current battle fatigue or wounds do not factor into the crafting equation! With this in mind, let’s look at the single most important factor in your crafting process: the resources used.
Resource Statistics
Before proceeding further, I would like to take a moment to recommend for ALL crafters, regardless of crafting profession, the website Galaxy Harvester. This website is critical to understanding what resources are currently available for harvesting on EiF (via an automated script that updates the website every two days), but it will also allow you to look up what resources are currently among the best that have ever spawned for each specific resource type. This will be very important as you accumulate resources for your eventual crafting empires. For reference, I spent the first three months on EiF collecting, sampling, and purchasing everything that I would need in order to break into the armor game and be competitive immediately. I strongly encourage you to have the patience to wait until you have collected good resources to use, instead of simply average ones. You will want your name associated with quality from the get-go! And while you are patient, a good combat toon is useful to help finance your accumulation of necessary resources.
Regardless of the resources used to craft your armor, there are only four (4) stats that matter. They are: OQ, SR, UT, and MA. Let’s look at each.
Overall Quality (OQ): This is the singular most important stat to consider. It basically counts for 50% of every formulatic equation in the process. It impacts an armor’s resists, condition, and weight. It will always be the most important stat to look for.
Shock Resist (SR): This is the second most important stat to consider. This stat, along with OQ, are the two that matters for calculating an armor’s effective resistance, which is the most important attribute of any piece of armor.
Unit Toughness (UT): This is the third most important stat to consider. This stat, along with OQ, are the two that matters for calculating what a piece of armor’s max condition is upon crafting. Now, you could reach the conclusion that UT doesn’t matter as much…. because the faster a piece of armor wears out, the quicker repairs or a new piece is required, hence more credits for you. But that little piece of ethical decision-making I will leave to you.
Malleability (MA): This is now the least important of the four stats to consider. This stat, along with OQ, are the two that matters for calculating how much a crafted piece of armor weighs. I say it is now the least important for two reasons: 1) the larger HAM pools on EiF (specifically the secondary pools), allow for a player to wear a full suit of armor unbuffed with no issues… and 2) armor weight has been revamped to now equal an AVERAGE of all pieces worn, as opposed to a TOTAL. To elaborate, on other servers (and originally on EiF), if I had on four pieces of armor, and each weighed 100, that would add up to a 400 point hit to my secondary pools. Since the armor revamp, those four pieces are now averaged, so my weight is 100 (100×4 / 4). Because of these reasons, the importance of Malleability isn’t as high as it used to be. There is also anecdotal evidence that a high Malleability could positively impact formula calculations, but I have uncovered no real evidence of this in practice.
One very important EiF feature pertaining to armor crafting and resources deals with Galactic Civil War armor types (and by extension, certain lootable armor schematics such as Sun Guard armor). As a bonus for participating in GCW events and content, these armor types bestow a “bonus” 5% to your resists. But this a little misleading… Remember when I said that an armor’s core accounts for 95% of the stats and the final assembly resources grant the remaining 5%? The bonus 5% pertains directly to the final assembly resources. In essence, a piece of GCW armor crafted with garbage final assembly resources and the exact same armor core would gain the full 5% final assembly bonus as if I used perfect resources in the final craft. This makes GCW armors statistically superior to any other type because the only way to naturally gain that 5% normally would be to use only perfect resources in the craft. This is not possible, as there hasn’t been a single “perfect” resource to ever spawn on EiF (meaning a resource would need 1000s in all the stats that matter). To give you some context, my resource collection from my time crafting allows me to use all server bests (or at least… 95%+ of them) in all of my full-protection armor. On normal, non-GCW crafts, I usually secure 3-4% of the 5% possible on final assemblies (closer to 4%). So GCW armors tend to be about .5% better than something like Bone armor… and about 1.5% better than RIS (denoting my strongest and weakest crafts, respectively). Again, this is due to the generic resource requirements for Bone and much harder RIS requirements.
We will come back to resources later on after we quickly go over the other contributors.
The Crafter
The second factor to consider is your actual crafter. At Master Armorsmith, most players will have 10 experimentation points (due to a 100 armor experimentation skill… 1 experimentation point per 10 points of skill). You will also have a 100 armor assembly skill. These stats can be improved by the utilization of Skill Enhancing Attachments (SEAs). Due to the nature of the attachments themselves, these will come in the form of clothing attachments. You should ALWAYS strive to secure an additional +25 to each skill in order to maximize the bonus available to you via SEAs. Even though you can achieve being a 12 point smith by reaching 120 armor experimentation instead of the max 125, those extra 5 points are factored into each and every experimentation roll you make and are important!
All races gain specific racial bonuses to various skill mods. For example, a Bith grants (among other things) a 5 point bonus to weapon, food, and droid experimentation. So it is possible for a Bith to be a 13 point smith in those three crafting types. However, no race currently grants a bonus to armor experimentation. Therefore, a 12 point smith is the maximum any player is currently able to achieve.
Your Crafting Tool
Crafting tools and crafting stations have long been a source of confusion and head shaking on the part of players, developers, and …well basically everyone. Both crafting tools and crafting stations have a crafting rating, a stat that presumably means something. However, for pre-NGE versions of SWG, the crafting station’s rating was never coded into the formulas and crafting equations to matter at all. This was rectified in a later NGE update. However for us, it’s still “broken/working as intended” or what have you.
The crafting tool, on the other hand, very much matters in the crafting process. It has a maximum value/rating of 15.0, and is absolutely included in the crafting formulas. You will want to secure the highest value crafting tool you are able to find. This is true for any crafting profession you elect to pursue.
Food and Drink
As previously mentioned, Pyollian Cake and Bespin Port are two valuable aids in your efforts to craft the perfect item. It is well worth your time and efforts to purchase the best examples of each that you are able to secure. A good Pyollian Cake can add an additional 15-18 to your assembly roll (weighted the same as 15-18 points in SEAs), and a good Bespin Port will add a good 19-21 points to your experimentation rolls. Note: these items are meant to be single-use items. One consumption of either should persist for a single assembly or experimentation roll. This will be important when I discuss experimentation point spending in a later section.
City Bonuses
Finally, the last important consideration to make is where you perform the craft. For more complex recipes, you will need to be standing in front of a public or private crafting station. These are often purchased by players and set up in their own player homes. While a crafting station does not grant a bonus to your crafting, being within proximity of one is necessary in order for more complex recipes to be automatically loaded by your crafting tool when you initiate a craft. The various crafting modules that can be built into a droid will satisfy this requirement, but if you craft out in the wild with one assuming you are outside of a player city limit, you will miss out on the City Bonus itself.
As previously mentioned, at level 5 a player city can elect to spend extra weekly funds to qualify for a city bonus. The only two that are relevant to us are the Manufacturing Center (for assembly bonus), and the Research Center (for experimentation rolls). The Research Center is the more expensive of the two and will drain the city’s treasury much faster. That being said, a bonus to an experimentation roll is far more important than an assembly bonus. I would highly encourage any would-be mayor to strongly consider selecting Research Center IF they intend for their city to be a crafting hub. Alternatively, if you are not a mayor or your home city is not in either of these specializations, seek out existing cities with this bonus and ensure you are making your goods there before returning home and marketing them elsewhere.
This covers most of the basics leading into the Armorsmith profession itself. Please note, there are other important aspects of Armorsmithing that I will not be covering at present. These include: the RIS questline, Armor Repair, PSGs, and all things surveying. While each relates to the overall topic, they are outside the scope of this Friday Feature. Besides, the guidelines I establish for crafting armor in the coming pages will apply to crafting PSGs also.
The Crafting Process
So lets’s say everything I have explained above you either understand or already knew. At this point, you care more about “what exact resources do you use?” and “what are the exact steps you are taking?” Let’s get to it.
I make two different classes of armor: starter armor, and full-protection armor. Starter armor is a piece that is crafted using segments containing only two layers: kinetic and energy. This is because the vast majority of the mobs a new player will be fighting as they level generally only hit you with one of those two types of damage. As such, using resources for the other unnecessary layer types is highly wasteful. This type of armor is ideal for new players who are starting fresh with 33% armor granted at character creation (my starter armor is typically 52 or 53% to Kinetic/Energy, making leveling much easier than the original 33%). Full protection armor, on the other hand, is intended for end-game or PvP content. This type of armor includes all layer types, crafted into a Laminated segment, which then goes into a core. I create everything for these processes via factory runs.
LAYERS
Layers form the basis for all armor crafting. Each Laminated Segment will accept one layer of each damage type. I attempt to craft each layer discussed below until I reach one I feel is perfection (or as close to it as possible) and then I turn it into a factory schematic, where 1000 of each are crafted.
KINETIC
Let’s look at each layer type individually, starting with Kinetic. As you can see in the picture below, Kenetic layers require 20 units of generic metal, 8 units of polymer, and 8 units of Amorphous Gemstones. All three of these resources are generic in nature. This clearly works to our favor. Looking closely, you will see that when it comes to crafting layers, Unit Toughness (UT) does not even factor into anything at all! OQ + SR will denote the protection level of the layer, while OQ + MA will affect the weight. Let’s get to crafting!

For my “Metal” requirement, I have selected the Kammris Iron: Wilaugaite. This is an exceptional choice because it has a very good OQ+SR combo (1969/2000). As a secondary consideration, the Malleability of a good Kammris Iron tends to be higher than that of Duralloy steel (my go to steel for high OQ+SR combos). So Wilaugaite wins.

For my Polymer requirement, the very old, server-best Sogiha wins. It has the best OQ+SR+MA combo. It remains my most important resource.

The Amorphous Gemstone is a little tricker. I usually use a Vendusii type due to their tendency to yield more generous stats. I have selected Pesaroism, due to the decent OQ+SR combo. It has a decent MA as well.

When combined, this will yield a 21% Durability / 29% Resistance base if the craft was merely a great success. An amazing would result in a 22/30. While that would be preferable, it is not mandatory.
So… what do we want by the time we are done? We want a Kinetic Effectiveness of at least 9% (which will occur if experimental resistance exceeds 90%). The idea is to get effectiveness maxed out while using the least number of experimentation points to do it. This is why I use a single, 8-experimentation point attempt at this stage (because if I drink Bespin Port and spend 8 points at once, an amazing roll will allow all 8 points to benefit from the amazing’s bonus, as opposed to doing 8 separate rolls). If I do not get ‘amazing’ experimentation, I scrap it and start over. If I DO get an ‘amazing’ , it will result in a value of 93% effectiveness. Leaving 4 experimentation points. It will only take one more to max out resists (regardless of the experiment result). Leaving 3 points to hopefully get ‘amazing’ on the durability. This is only relevant for armor weight. So…. I was able to pull ‘amazing’ durability experimentation, resulting in a 45%/97% overall.

This is decision time. The only thing that could have made this better is if I had gotten ‘amazing’ on the assembly (which would have resulted in a final 47% Durability / 97% Resistance. What does this mean? It means that there are hidden decimals associated with each of these stats that the crafter can not see. When layers are crafted into a segment and then three segments go into a core, those hidden decimals could result in a slightly better result on the final product. But in this case, because we are dealing with a difference in a segment’s weight (SAC cost), I really don’t care due to previous discussions on the matter. So I would turn this into a factory schematic and craft 1000 of them. Please note, these examples are for FULL PROTECTION only! I do not use my best resources for the creation of starter armor. Anything over a 50% kinetic/energy combo is gravy for starter armor. I will leave which resources to use to you for starter armor crafting.
So to be clear, take another look at the image above. You will see I have a 97% Experimental Resistance showing, but in the Kinetic Effectiveness above, it shows a 9%. In reality, my Kinetic Effectiveness is a 9.7% (the .7 is hidden and not rounded up for display… and reflects the 97% max roll from the bottom section). This is important because remember each armor core can accept up to three segments. Each segment contains one layer. If I use this layer in three different segments, the armor core will benefit from those hidden .7s!) Instead of seeing a 27% (9% effectiveness x 3 layered segments), it’s really gaining 9.7 x 3 for a 29.1%. There is more to it, of course (as the resources used in the segment and core final assemblies also impact this number). But hopefully, this demonstrates the importance of getting as much out of your resources as possible.
The Durability/Encumbrance line is handled differently. As the higher I go in the durability line, the lower the Encumbrance would be.
ENERGY
For the remaining layer types, I will simply show you the resources I elect to use for the process since everything else is literally identical.
I use the same Sogiha Polymer and Wilaugaite Kammris Iron. For the Known Inert Gas, I use Beloris Kaylon Inert Gas because OQ is the only stat that matters on it.

For the Low-Grade Ore, I select Sokoium Mandalorian Intrusive Ore for its exceptional OQ+SR combination.

For the record, my energy layer is the strongest of the nine types. This is an excellent combination of resources!
BLAST
The blast layer is amusing in the sense that it utilizes a combination of the resources I used in the crafting of my energy and kinetic layers.

That means I use Sogiha Polymer, Wilaugaite Kammris Iron, Sokoium Mandalorian Intrusive Ore, and Pesaroism Vendusii Amorphous Gemstones. This results in a very strong blast layer. These first three layer types are the easiest to make. I mean this from the perspective of finding excellent resources. The remaining resources all have one or more less friendly requirements…. so let’s get to them in alphabetical order from this point on.
ACID
Here is the requirement for an acid layer:

Non-Ferrous metals are either Copper or Aluminum. These metals are less friendly when it comes to high resist stats due to lower possible max SR stats on these types of metals when compared to irons and steels. This is where I bust out my second most important Armorsmith resource (behind only the Sogiha polymer), and that is Coicadyite Phrik Aluminum. In general, Phrik aluminums tend to yield more beneficial stats than other types, but this specific resource is almost as old as the server is. It has a very good OQ+SR combo (for aluminum), and an exceptional OQ+MA combo.

The generic Crystalline Gemstone requirement allows me to utilize the exceptionally good Fauhisis Vertex gemstone.

Finally, the Skevon Reactive Gas requirement is satisfied by the server-best Veedi.

COLD
Cold layers require general Aluminum, Polymer, and any Carbonite Ore.

This means that we can reutilize both the Sogiha and the Coicadyite Phrik Aluminum. This leaves only the Carbonite ore. A weakness of Carbonite ore is that the max SR tends to be capped lower. This does impact the highest possible resist %…. and this is very important information to understand. Because this means (and hear me on this) that certain damage types can NOT theoretically reach the server cap of 55% (I’m specifically looking at you Lightsaber… though it is certainly not the only one). The Carbonite ore I use for cold layers is Ihaho Zinsiam. Zinsiams tend to be the go-to for armor.

Even with a lower SR cap, This combination of resources will still yield an unsliced 53% for Cold resist.
ELECTRICAL
Electrical layers require Copper, Polymer, and Siliclastic Ore.

Electrical layers are difficult because the primary metal used is copper. As an aside, this makes absolutely no sense… because copper conducts electricity so well… but whatever… I just play here. Since it is a generic copper requirement, this opens up the inclusion of Jump To Lightspeed resources. Specifically, I am looking at Conductive Borcarbitic Copper, because it’s max SR value is higher than any other type of copper (1000 max). As a result, I dig into my Weaponsmith/Artisan resources and pull out Dlefeine, due to it’s OQ+SR combination. While the OQ is average and the MA is horrible, I have no other copper than combines to surpass a 1798 combined OQ+SR.

As you might have guessed, I continue to use Sogiha as my go-to Polymer for all high-end armor crafting, leaving only the Siliclastic Ore to address. Since it is generic Siliclastic, I have a wider range to choose from. Certain Siliclastics have fully opened up resource stats… so it IS possible to secure a perfect one. The best I have been able to collect up to this point is Wilameate Fermionic Siliclastic. I have had my best luck with Fermionics. This particular one has respectable numbers across the board. A better one will certainly spawn one day. But until then, this is what I use:

HEAT
The heat layer is another example of a type that recycles resources used in other laters. It requires any Non-Ferrous, Polymer, and Intrusive Ore.

This means I recycle the Coicadyite Phrik Aluminum, Sogiha Polymer, and Sokoium Mandalorian Intrusive Ore.
LIGHTSABER
Lightsaber layers are a mess. They require only two resources to make: Phrik Aluminum and Cortosis Siliclastic Ore. Unfortunately, while I can once again use the Coicadyite for the aluminum, we are saddled with the need to use Cortosis ore. Makes perfect sense canon-wise, but the max values Cortosis can manage for SR is horrible. (I mean really… it sucks.)

It is important to show you how horrible Cortosis is. Here are its min and max values for the stats that matter:

That being said, the highest combo of OQ+SR possible is 1200. Ouhe is the server best for use in lightsaber layers with its combined 1024 value. May we get better one day…..

STUN
The final layer to discuss is stun. It requires any ferrous metal (steel or iron), Vertex Crystalline Gems, and Crism Siliclastic Ore.

I am pleased to reutilize the Wilaugaite Kammris and the Fauhisis Vertex Crystalline Gemstones. Unfortunately, the final requirement, Crism Ore, is similarly constrained as Cortosis is. The server best for our purposes is Dotocoris.

SEGMENTS
LAMINATED SEGMENTS
Once all 9 different types of layers have been crafted in a factory, the time has come to combine them into Laminated Segments. Each segment accepts one layer of each type and also requires any steel.

The only necessary resource to discuss is the steel used. Notice that now, in addition to the OQ, SR, and MA….. Unit Toughness is figured into the mix, because while layers only have resist types and weight, segments now add condition into the mix. I select Gikiiam Duralloy steel for its exceptional OQ+SR combo, as well as very high UT.

This will yield a result similar to this final laminated segment, which is turned into a factory schematic (below). But because each armor core requires 3 segments for optimum performance, an ultimate armor core batch of 333 count is the highest possible. Notice, if you will, that the crafting of the segment added essentially 5% to the effectiveness of each damage resist type. This is due to the very high OQ+SR of the steel used.

CORES
Armor cores require Leather Hide and any Metal. In addition, they can accept up to three Armor Segments (and in reality, you will never NOT want to use three segments in a serious piece of armor).

Armor cores prove slightly more problematic compared to segments, this is primarily because the main resource ingredient is leather armor, with metal being the secondary resource. Leather Hide is harder to find with maxed out OQ and SR. My current go-to for Leather Hide is Kiwoma.

For the metal component, I reuse the Wilaugaite Kammris Iron. When combined with the segments, they combine to produce the following:

When you add the possible 5% from final assembly resources, it is possible to currently hit 54% resists on the Kinetic, Energy, and Blast layers, with several other layers resulting in 53%s.
So let’s reexamine something. Remember when we crafted the segment and it added what looks like 5% to each resist type? In the final core crafting, we see that something different has occurred. If my segment had a 14% energy effectiveness, using three of them would have yielded a 42% effectiveness, no? But instead, I have a 49% shown above. How did this happen? It happens for two reasons:
- Those hidden decimals I was referring to played a part here
- The resources used in the final craft of the core came into play also. This accounts for the 7% jump. It’s worth pointing out, that the actual effectiveness of the energy resist is almost certainly NOT an even 49.0%. Hidden decimals remain and will interact with the final assembly resources to influence the final product.
So, in conclusion, getting 50% effectiveness across the board is the theoretical cap for an armor core, even though as we discussed previously, some of those damage types can not produce such a high number. This is why when looking at my own armor, I can manage 54%s in several damage types, but only 48% (unsliced) in Lightsaber. I doubt I will ever be able to ultimately raise it above 49, but I haven’t done the math to prove it.
The 22686 Armor Integrity relates directly to an armor’s condition and works in conjunction with the OQ+UT (+slot type) if a piece of armor to determine a piece’s max condition (remember, a chest piece or a piece that covers multiple slots will always gain more condition than say, a pair of gloves).
This concludes our Friday Feature. This was a long read, and if you made it this far, it is my sincerest hope that I have in some way helped and motivated you to excel at Armorsmithing!